
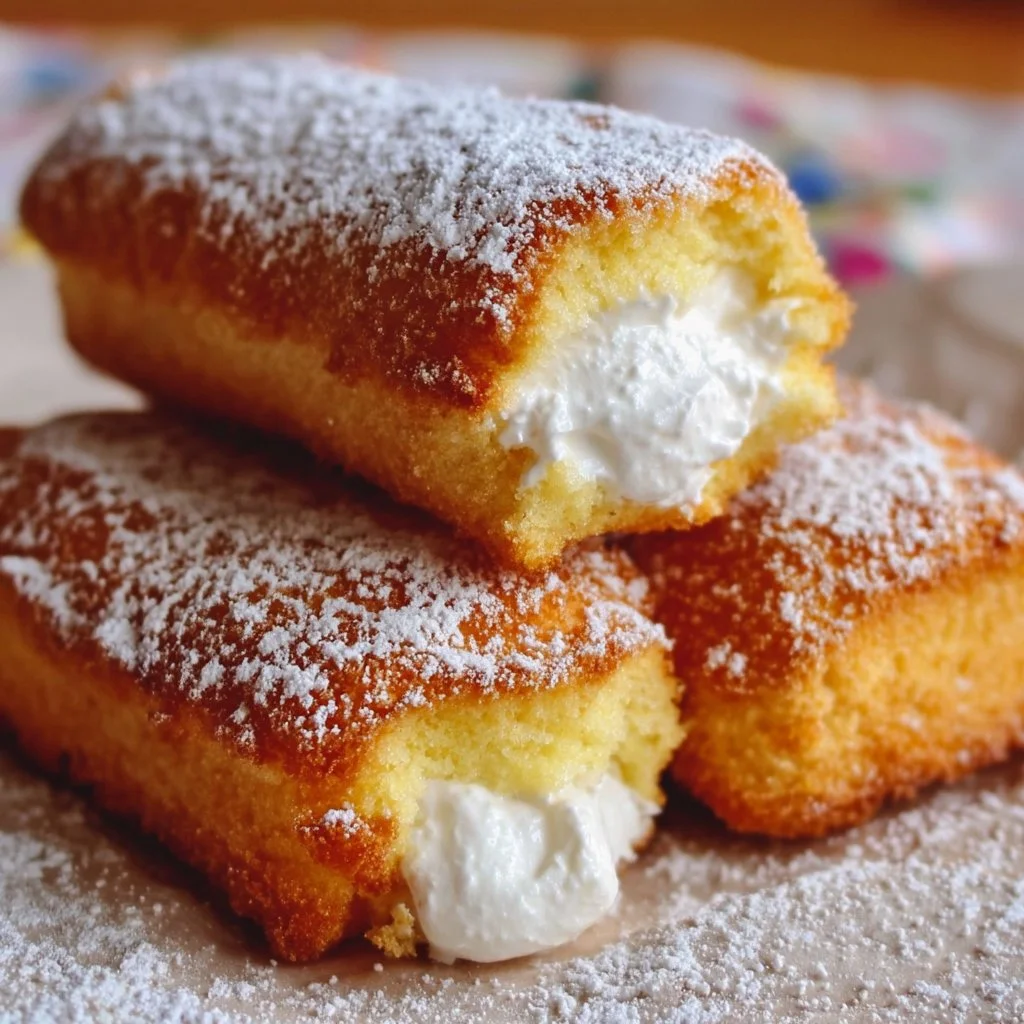
There’s nothing quite like the joy of biting into a soft, creamy-filled Twinkie—a nostalgic treat that brings back memories of childhood snacks and sweet indulgences. Making Back-to-School Homemade Twinkies is not only a fun kitchen project but also a chance to create a healthier, fresh version of this iconic dessert. These delightful baked goods are perfect for school lunches, cozy family gatherings, or simply as a special treat after a long day. The best part? You can customize them just the way you like!
Why make this recipe
What makes this recipe special
Homemade Twinkies are a game changer for many reasons. They are quick to prepare, made with simple ingredients you likely already have in your pantry, and they channel that classic flavor without the preservatives found in store-bought versions. Perfect for busy weeknights, these sweet snacks can be ready in under an hour. Moreover, kids will love helping out in the kitchen, making them a fantastic family bonding activity.
“These homemade Twinkies taste even better than the ones I remember! Soft, sweet, and so much fun to make with my kids!” – Sarah, mom of three.
How to make Back-to-School Homemade Twinkies
Preparing Back-to-School Homemade Twinkies
Making these delightful treats is a straightforward process. Here’s a quick rundown: you’ll whip up a simple cake batter, bake it, and then fill it with a luscious whipped cream. It’s less complicated than it sounds, and the results are incredibly rewarding. Gather the ingredients, preheat your oven, and get ready to create something magical!
Ingredients
Gather these items
For this recipe, you will need:
- 1 cup all-purpose flour
- 1/2 cup granulated sugar
- 1/4 cup unsalted butter, softened
- 2 large eggs
- 1/2 cup milk
- 1 teaspoon vanilla extract
- 1 teaspoon baking powder
- 1/4 teaspoon salt
- 1 cup heavy cream
- 1/2 cup powdered sugar
When choosing your ingredients, go for high-quality butter for a richer flavor. If you have dietary restrictions, feel free to substitute almond milk for dairy or use gluten-free flour. The vanilla extract is also essential; it enhances the sweetness beautifully.
Directions
Step-by-step instructions
- Preheat the Oven: Start by preheating your oven to 350°F (175°C). Grease a Twinkie pan or muffin tin to prevent sticking.
- Cream the Butter and Sugar: In a mixing bowl, cream the softened butter and granulated sugar together until the mixture is fluffy and light.
- Incorporate Eggs and Milk: Add the eggs one at a time, mixing well after each addition. Pour in the milk and vanilla extract, stirring until fully combined.
- Mix the Dry Ingredients: In a separate bowl, whisk together the flour, baking powder, and salt. Gradually mix this into your wet ingredients until just combined—don’t over-mix!
- Fill the Pan: Carefully pour the batter into the prepared pan, filling each cavity about two-thirds full.
- Bake to Perfection: Place the pan in the oven and bake for 15-20 minutes. Check for doneness with a toothpick; it should come out clean when inserted into the center.
- Cool: Remove the pan from the oven, allow the cakes to cool in the pan for a few minutes, then transfer them to a wire rack to cool completely.
- Prepare the Filling: While they cool, whip the heavy cream and powdered sugar together until stiff peaks form—this will be your delicious filling.
- Assemble: Once the cakes are cool, use a piping bag to fill each Twinkie with the whipped cream. Slice them if needed to get the filling inside.
- Enjoy: Serve them fresh, and watch them disappear!
How to serve Back-to-School Homemade Twinkies
Serving suggestions
These homemade Twinkies shine on their own, but you can elevate the experience with creative plating. Dust them lightly with powdered sugar for a touch of elegance, or drizzle some chocolate or caramel sauce on the plate for extra sweetness. Pair them with fresh berries or a scoop of vanilla ice cream for a dessert that’s sure to impress. As a bonus, serving them alongside a steaming cup of coffee or a comforting glass of milk brings out the nostalgia even more!
How to store
Keeping leftovers fresh
If by some chance you have leftovers (a rare occurrence!), store your Twinkies in an airtight container in the refrigerator. They’ll stay fresh for about 3-4 days. For longer storage, consider freezing them: wrap each Twinkie individually in plastic wrap and place them in a freezer-safe bag. They can last up to three months in the freezer! When it’s time to enjoy again, let them thaw in the fridge or at room temperature before serving.
Tips to make
Helpful cooking tips
- Room Temperature Ingredients: Ensure your eggs and butter are at room temperature before mixing. This helps create a smoother batter.
- Don’t Overmix: When combining the wet and dry ingredients, mix just enough until combined to avoid dense cakes.
- Piping Mastery: If you don’t have a piping bag, a resealable plastic bag with a corner cut off works well for filling the Twinkies!
Variations
Creative twists
Feel free to get creative with flavors! For a chocolate version, substitute half of the flour with cocoa powder. If you’re a fan of fruity flavors, fold in some zest from lemon or orange for a refreshing twist. You can also explore different fillings, like peanut butter cream or flavored whipped cream (mixed with strawberry puree, for example).
FAQs
Common questions
- How long does it take to prep?
- The preparation time takes about 15 minutes, with an additional 15-20 minutes for baking.
- Can I substitute any ingredients?
- Absolutely! Use almond milk for a dairy-free option or gluten-free flour for a gluten-free version.
- How do I safely store leftovers?
- Store them in an airtight container in the fridge for 3-4 days. You can also freeze them wrapped individually for up to three months.
Now that you’ve mastered the art of Back-to-School Homemade Twinkies, get ready to indulge in a delightful treat that satisfies both nostalgia and culinary creativity! Happy baking!
Print
Back-to-School Homemade Twinkies
- Total Time: 35 minutes
- Yield: 12 servings 1x
- Diet: Vegetarian
Description
A nostalgic treat made healthier at home, perfect for school lunches or family gatherings.
Ingredients
- 1 cup all-purpose flour
- 1/2 cup granulated sugar
- 1/4 cup unsalted butter, softened
- 2 large eggs
- 1/2 cup milk
- 1 teaspoon vanilla extract
- 1 teaspoon baking powder
- 1/4 teaspoon salt
- 1 cup heavy cream
- 1/2 cup powdered sugar
Instructions
- Preheat the oven to 350°F (175°C) and grease a Twinkie pan or muffin tin.
- Cream the softened butter and granulated sugar together until fluffy.
- Add the eggs one at a time, mixing well after each. Pour in the milk and vanilla, stirring to combine.
- Mix the flour, baking powder, and salt in a separate bowl; gradually incorporate into the wet mixture.
- Fill the prepared pan about two-thirds full with batter.
- Bake for 15-20 minutes until a toothpick comes out clean.
- Cool the cakes in the pan for a few minutes, then transfer to a wire rack to cool completely.
- Whip the heavy cream and powdered sugar until stiff peaks form for the filling.
- Pipe the whipped cream into each cooled Twinkie.
- Serve fresh and enjoy!
Notes
For added flavor, use high-quality butter and feel free to substitute ingredients based on dietary preferences.
- Prep Time: 15 minutes
- Cook Time: 20 minutes
- Category: Dessert
- Method: Baking
- Cuisine: American
Nutrition
- Serving Size: 1 Twinkie
- Calories: 250
- Sugar: 12g
- Sodium: 200mg
- Fat: 14g
- Saturated Fat: 8g
- Unsaturated Fat: 4g
- Trans Fat: 0g
- Carbohydrates: 30g
- Fiber: 1g
- Protein: 3g
- Cholesterol: 40mg
Keywords: Twinkies, dessert, homemade, nostalgic treats, baking